A brief look at Azure Files. Here is the summary provided by Microsoft.
Windows Azure Files allows VMs in a Windows Azure Data Center to mount a shared file system using the SMB protocol. These VMs will then be able to access the file system using standard Windows file APIs (CreateFile, ReadFile, WriteFile, etc). Many VMs (or PaaS roles) can attach to these file systems concurrently, allowing you to share persistent data easily between various roles and instances. In addition to accessing your files through the Windows file APIs, you can access your data using the file REST API, which is similar to the familiar blob interface.
Signing up
At the time of writing, the Azure Files service is in preview and
therefore must be activated for your account. You can do this by going
to the the preview
page and clicking
“Try it”.
During the activation, you are asked which subscription you wish to
apply it to. Then it is a waiting game.
The activation took 21 days! This process is obviously subject to change
when the service moves out of beta.
The Scenario
In my case, I want to create a shared disk that is accessible from two
VMs.
Creating a storage account
Once Azure Files is activated on your account any new Storage account
you create will have it enabled automatically. At the time of writing,
I am not aware of a way to retroactively enable Azure Files on an
existing storage account.
You can create the new Storage Account through the portal or through the
APIs (http://msdn.microsoft.com/library/azure/ee460790.aspx).
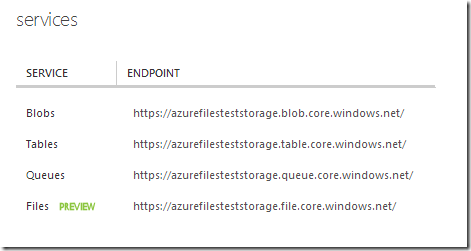
When you create the account, you can check that Azure Files is enabled
by logging into the portal and looking at the dashboard of the storage
account. Here you should see the Files endpoint enabled.
Creating the Share
Currently, you can only create the share through the PowerShell Cmdlets
or through the API. I decided to use PowerShell.
- Start by downloading the CmdLets from here.
Important: Make sure you right click the downloaded archive and unblock it from the properties before you extract it.
- Extract the Zip archive to a known location. I chose c:\PSAzureStorage\
- Load PowerShell and run the following:
# import module and create a context for account and key
import-module c:\psAzureStorage\azurestoragefile\AzureStorageFile.psd1
$ctx=New-AzureStorageContext <account name> <account key>

# create a new share
$s = New-AzureStorageShare <share name> -Context $ctx
Replace the placeholder text with the following:
- <account name> – This is the name of the storage account. <account name>.file.core.windows.net. In my case: azurefilesteststorage
- <account key> – This can be found in the portal under Manage Access Keys.
- <share name> – Replace this with the name of the share you wish to use.
That’s it – you now have a cloud accessible file share.
Accessing from Windows
The next step is to access that share from remote locations. To do
this, I created an Azure Virtual Machine, but I could have easily used
my own computer.
Load a command prompt and run the following:
net use z: \\<account name>.file.core.windows.net\<share name> /u:<account name> <account key>
Again, make sure you replace the placeholders with the appropriate
values from above. This command is the standard command for mapping a
network drive. Only this time, the drive is in Azure.
Do this on all the machines you wish to have access.
You can now access this drive just like any other network drive from
This PC in Windows.
Performance
Obviously, the next step is to test performance. The test is obviously
restricted by the bandwidth on the machine, so I decided to use the
Azure VM I created earlier. As we all know, Azure datacenters have more
bandwidth than god, but I must admit, the results below were quite
surprising.
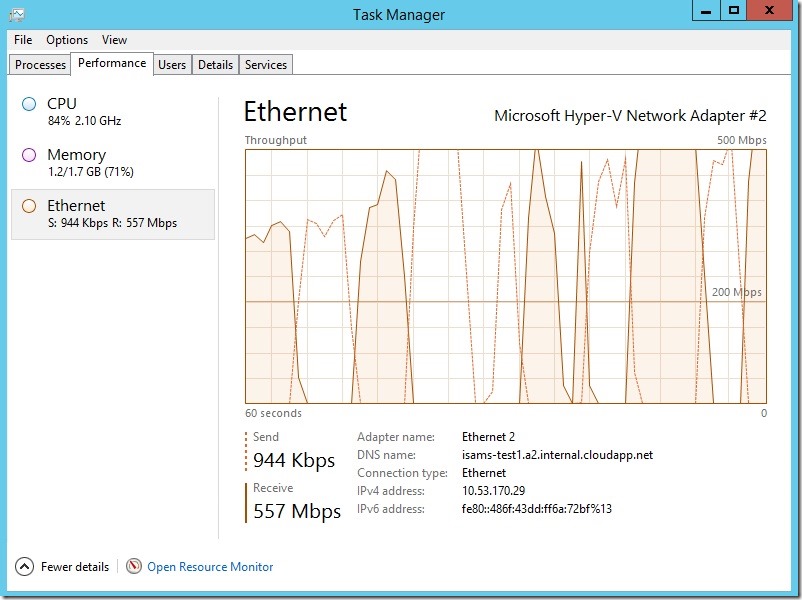
The transfer peaked at 60 MB/Sec write and 67 MB/sec read. That is
pretty impressive! I decided to watch the network traffic whilst this
was happening and took a snapshot.
As you can see, at the point in time the screenshot was taken, there was
557Mbps being received via the network adapter. Seriously fast!
Note: The limiting factor of any speed test you do yourself, will be your internet connection. The above was so fast because it was performed on an Azure VM.
Conclusion
Azure Files is a fantastic addition to the Azure family and is a feature
that I can certainly think of some uses for.


